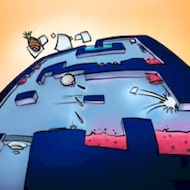
You are three screens up, boots planted on a ledge barely wider than your own body, and the last checkpoint already feels like a distant memory. One more leap separates you from the next platform, and the wall to your right seems to dare you into a kick-off you have not quite timed correctly yet. Big Tower Tiny Square runs on this exact rhythm from its opening screen: tight margins, instant resets, and a pineapple waiting somewhere above the clouds.
| Genre |
Precision platformer |
| Platforms |
Browser and mobile |
| Player character |
The tiny square |
| Goal |
Climb the tower and recover the Pineapple |
| Core mechanic |
Wall jumps, timed leaps, checkpoint respawns |
Wall Jumps and Timing Windows in Big Tower Tiny Square
The single move that decides most runs is the wall jump. Kick off one wall, drift toward the opposite side, and jump again before gravity pulls you into whatever hazard sits below. The window for a clean kick-off is short, and holding the jump button a fraction too long sends you into a lava pit instead of onto the ledge you were aiming for. Early screens teach this timing in isolation, with a single wall and a single gap, so the mechanic feels forgiving before the tower starts stacking hazards on top of it.
Speedrunners treat this jump as the backbone of any fast climb, chaining kick-offs across three or four walls without touching solid ground. Casual players tend to over-jump, tapping the button early out of nerves, which is usually what sends them tumbling back to the last save point. Once you stop rushing the input and start reading the gap in front of you, the whole climb gets noticeably calmer.
By the time you reach the mid-tower screens, wall jumps stop being optional and start being the only way through. There is no floaty double jump to bail you out here, no dash to cover a bad read. Just the square, the wall, and your reaction time.
Lava Pits, Lasers, and the Obstacles That Punish Guessing
Big Tower Tiny Square mixes a handful of recurring hazards rather than inventing something new on every screen. Lava pits force you to commit to a jump distance without a second chance mid-air. Bullets fire in fixed patterns that reward memorization over reflexes once you have died to them a couple of times. Spinning spikes and movement-sensing lasers show up more often the higher you climb, and they punish hesitation almost as harshly as a bad jump.
Beginners tend to treat each obstacle as a fresh puzzle, which slows the run down and invites mistakes born from overthinking. Regular players read screens as patterns instead.
What actually separates a smooth run from a frustrating one is not raw skill so much as pattern recognition. A player who has died to the same laser three times will start jumping before it fires on the fourth attempt, and that muscle memory is really what the tower is testing.
Checkpoints and the Cost of a Careless Fall
Checkpoints in Big Tower Tiny Square are generous compared to many precision platformers, which is the main reason the game stays approachable despite its difficulty. Every failed jump sends you back only a screen or two, not to the base of the tower, so death carries an annoyance cost rather than a real setback. That said, players who ignore the checkpoint indicator entirely and just mash forward tend to burn through far more attempts than necessary.
Speedrunners often talk about checkpoint routing on forums, planning which risky jumps are worth attempting mid-run versus which ones to play safe until a fresh checkpoint locks in. This is one of the more overlooked layers of strategy in an otherwise straightforward climb.
What Beginners Get Wrong on Their First Climb
Most first-time players lose their early attempts to a small set of habits rather than the tower’s actual difficulty:
- Holding the jump button too long, which sends the square higher than intended
- Jumping toward a wall instead of away from it during a kick-off
- Rushing gaps instead of reading the lava pit width first
- Ignoring bullet timing patterns after the first death to them
None of these are punished harshly on their own, but stacked together they explain why the average beginner run to the top takes close to an hour, according to player-reported completion times, while experienced climbers finish in well under fifteen minutes.
Early Screens Compared to the Upper Tower
The gap between the bottom of Big Tower Tiny Square and its upper floors is stark. Early on, hazards appear one at a time, giving you room to learn the wall jump without pressure. Once you pass the midpoint, screens start layering lava pits under laser sweeps and bullet lines back to back, demanding the same timing you learned early but with almost no margin for error.
This escalation is exactly what keeps the community talking about the tower long after finishing it once, since a clean top-to-bottom run without a single death is a genuinely rare feat.
Recovering the Pineapple at the Summit
The final stretch strips away most of the earlier hazard variety and instead compresses everything you have learned into a tighter, faster sequence. It is less about a single hard jump and more about stringing together everything the tower already taught you without a slip. Reaching the top and finally grabbing the Pineapple after dozens of respawns is, by most player accounts, the single most satisfying moment the game offers.
How long does Big Tower Tiny Square take to finish?
Beginners generally need close to an hour to reach the top for the first time, while skilled players and speedrunners can clear the entire tower in around fifteen minutes once the patterns are memorized.
Are the checkpoints in Big Tower Tiny Square generous?
Yes. Checkpoints trigger frequently enough that a failed jump only costs you a screen or two of progress rather than a full restart, which keeps repeated deaths from feeling punishing.
Is Big Tower Tiny Square hard for someone new to precision platformers?
It is challenging but not unfair. The wall jump and hazard patterns are taught gradually near the base of the tower, so newcomers who take the early screens slowly tend to adjust before the harder mid-tower sections appear.
Big Tower Tiny Square earns its reputation one respawn at a time, turning a simple climb into a test of patience that most players only appreciate once they finally see the Pineapple up close. The tiny square never gets new abilities, no upgrades soften the later screens, and that stubborn simplicity is exactly why the tower keeps pulling people back for another attempt.